Have you checked out Pinterest yet? It is a virtual bulletin board for saving photos and their links of anything found online. I am hooked on it and have discovered so many different ideas, including craft projects, recipes and even travel ideas. (You can check out my pinterest boards if you want!) I found a photo of a ball of slime on Pinterest and decided this was a project I had to try with my son. A Google search for slime turned up a number of recipes for homemade slime, all with the same ingredients but some with different quantities. I used the recipe posted on Our Best Bites website and want to thank Sara Wells for the instructions and inspiration for this awesome kids craft/science project!
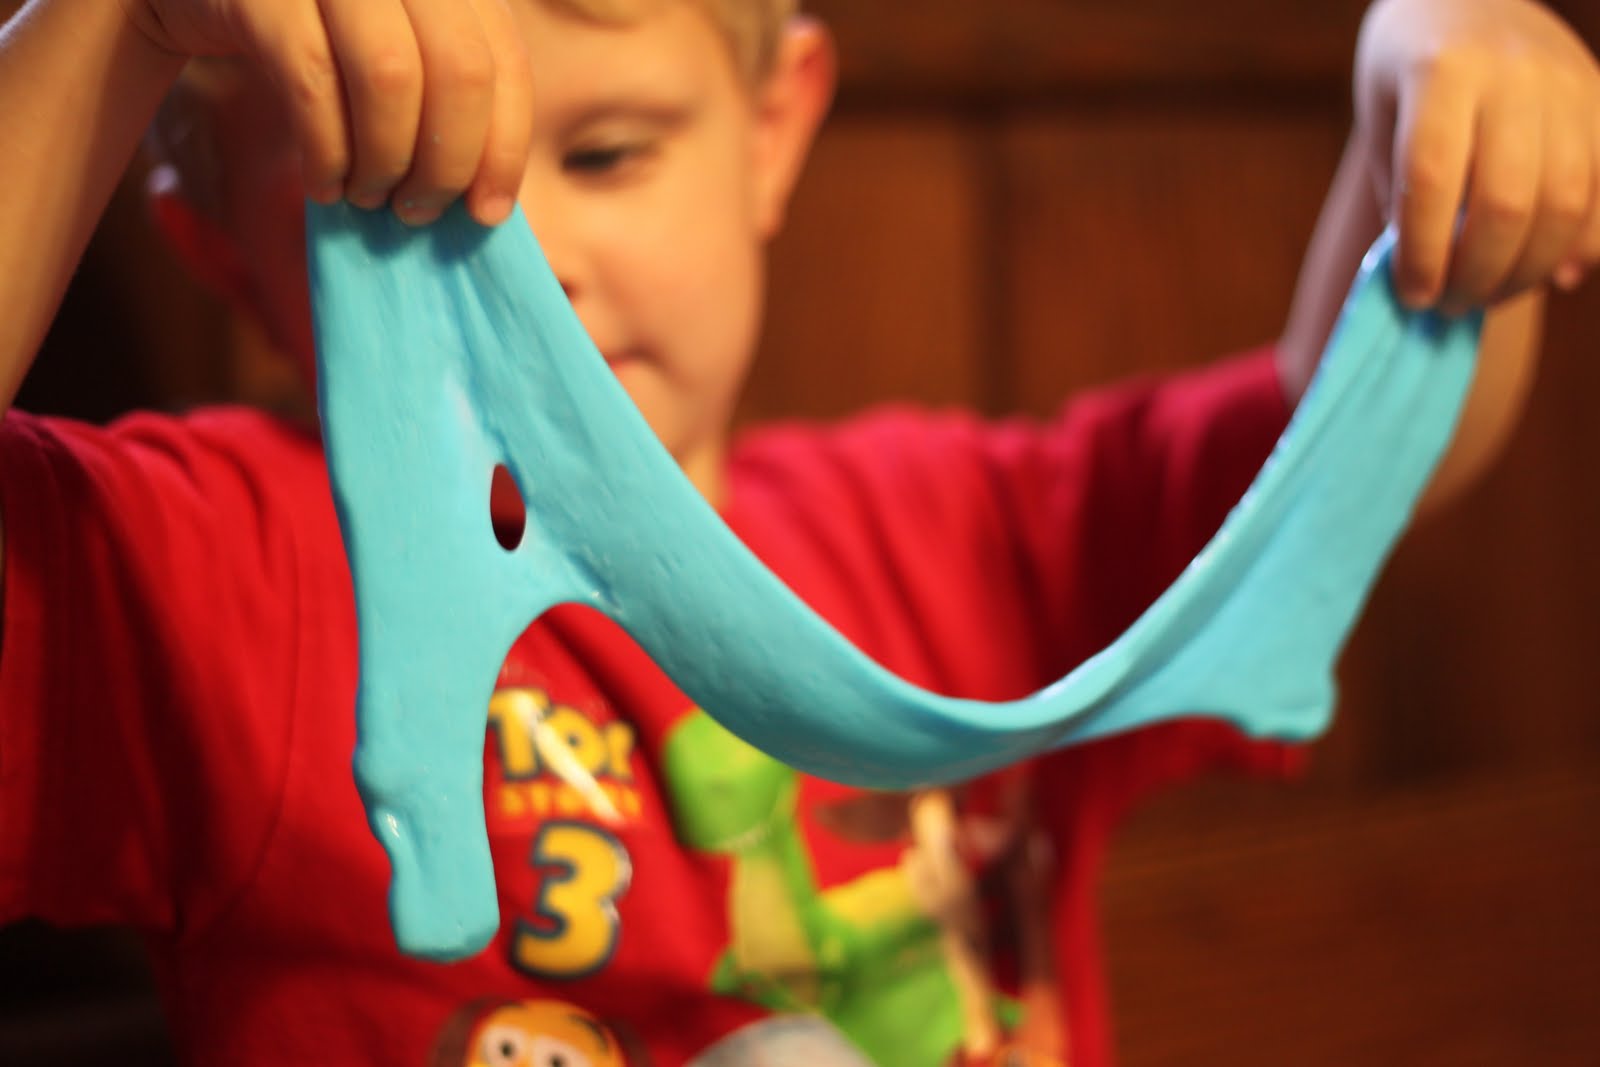
Slime is a polymer, making it the consistency of a liquid and a solid. It will puddle a bit on a table, but can be picked up in one piece. It will take the shape of the container it is stored in like a liquid, but will come out of the container in a solid mass. If shaped into a ball and set down, it will slowly “melt” into a pancake shape. I shaped some into a snowman shape for my son and told him to watch him melt–he thought it was hysterical.
Making slime is very simple and children can help. Before you start this project it is really important that the kids making and playing with the slime understand that it is NOT edible! If your child still likes to taste things, wait to do this project with them until they are old enough to understand that they cannot taste this, as the slime is made out of glue and borax, ingredients that are not food.
I used the recipe provided on Our Best Bites as a guide. Here is our experience with making slime and exactly what I did to make our batch of blue goo.
Supplies:
- 1 teaspoon of Borax powder (found in most laundry detergent aisles at the grocery store.)
- 1 cup of water
- One 4 ounce bottle of white glue (any brand will work, but glue like Elmer’s.)
- 1/2 cup of water
- Liquid food colors (I used McCormick’s Neon colors)
- washable glitter glue (optional)
- plastic spoon, wooden ice pop stick
- medium sized glass bowl
- Paper to cover the work surface
- Plastic place mat or cutting board

Directions:
- Mix the Borax powder into the one cup of water with the plastic spoon. It takes a while for it to dissolve, but it will eventually. Set aside.
- In the glass bowl, have your child pour the bottle of glue. My son loved this! Then add the half cup of water and stir with a wooden stick to combine. I also added about a tablespoon of glitter glue to see if it would make the slime sparkle. Add the food coloring, if using. We added five drops of blue to get the intensity of the color we wanted. Continue to mix up the colored glue until smooth and well combined.
- Have your child pay attention to this next step, as this is where the big action happens. While your child is stirring up the colored glue, slowly pour the borax solution into the bowl and watch as the liquids begin to solidify. Stir a bit and then remove the gloopy glob that has formed and knead it on your covered surface. Discard the remaining liquid in the glass bowl, as not all of it will absorb.
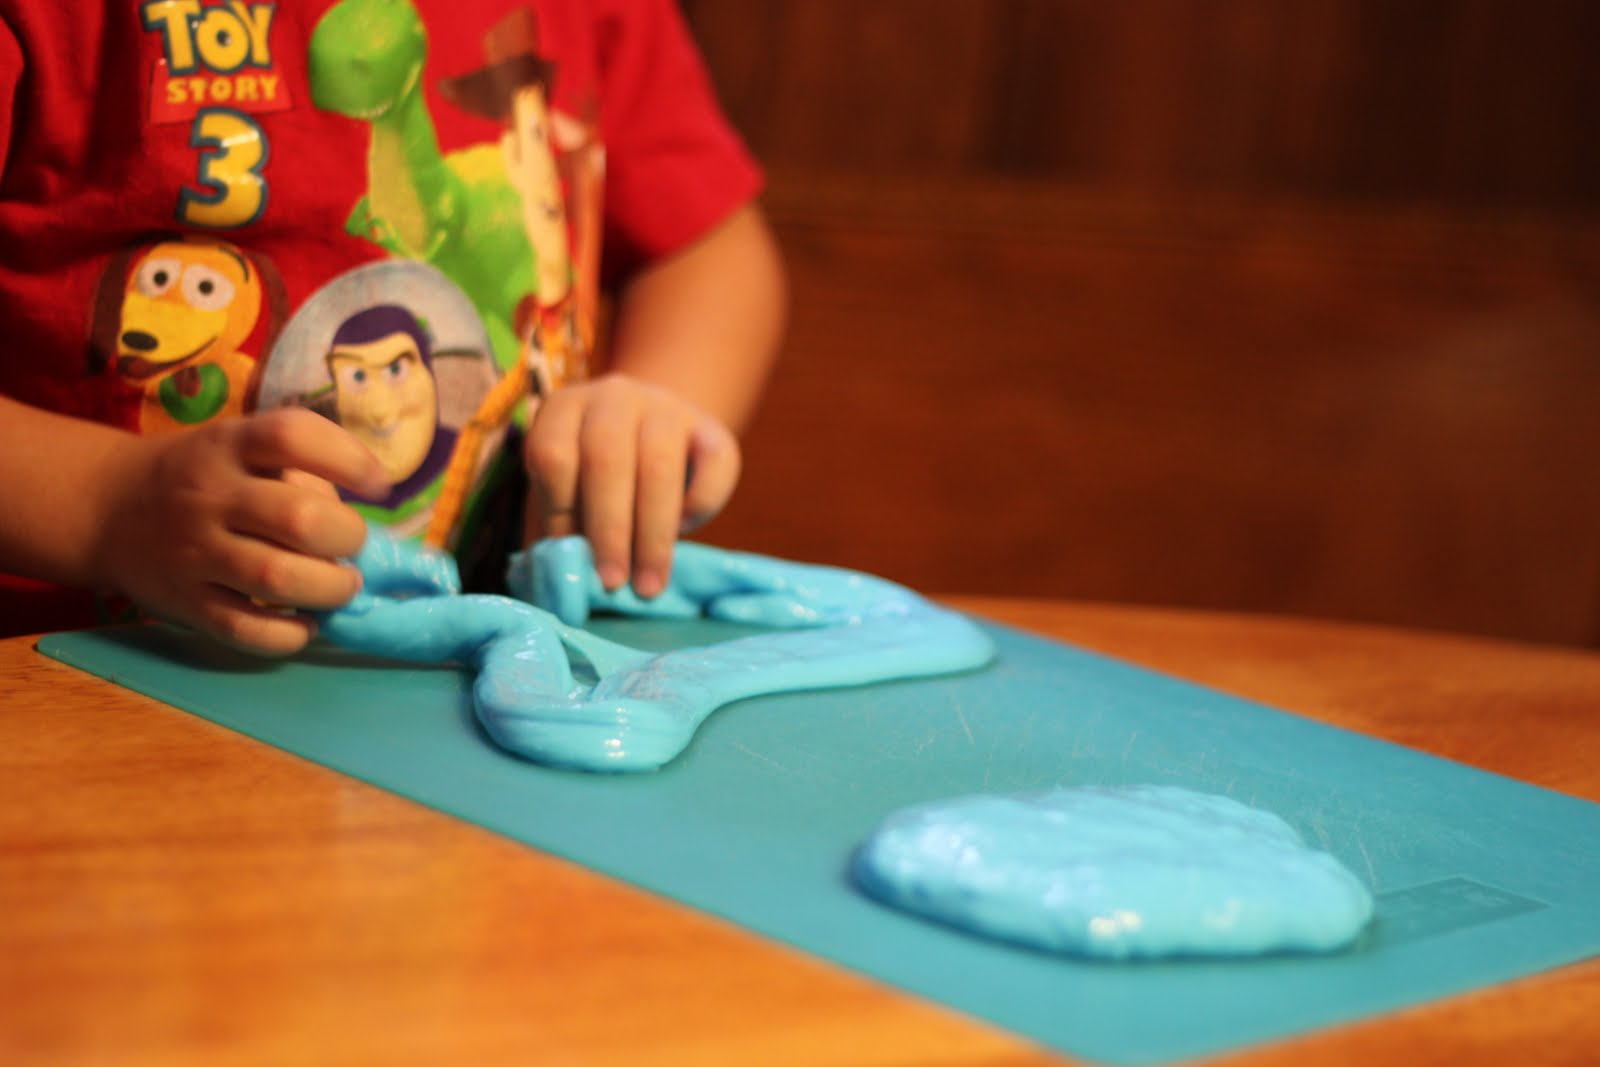
- Once the slime has been kneaded you might want to switch to a plastic place mat or cutting board to work on, as the slime will stick to paper. I used a cutting mat I picked up at Ikea, as it is a great crafting surface and cleans easily.
- Show your child how the consistency of the slime changes when it is left alone versus when it is manipulated. My son played with this slime for OVER an hour! He just loved making things out of it and seeing how far he could stretch it.
- Store the slime in a sealed container or zipper bag for future fun.


The glitter glue that I added did show up in the final product, but was not very pronounced. I think adding more glitter would have made a bigger impact. My rule with slime, as is the rule for clay/playdoh, is that it has to stay in the kitchen! This stuff will stick to carpet and while it probably could be removed with water, if you added food coloring, it might stain. Our fingers had a slight blue cast to them when we were done playing, but it seemed to wash off. My table, where the slime poured over the edges of the mat, was not stained. Clean up with water worked fine on the bowl, table and floor. Have fun! If you try this project, I’d love to hear how it worked for you!
You can find other crafts, recipes and preschool activities on Diane’s blog Knitting Zeal.
