Archive for the ‘Christmas’ Category

Longwood Gardens Christmas Info

October 19, 2011
People come from far and wide to check out the amazing light and flower displays at Longwood Gardens at Christmastime. It is truly magnificent and magical! This year should be no exception, so be sure to make plans for a visit!

Before you pack up the car and kids, take note of some changes Longwood is making for the Christmas Season:


1) Limited Tickets.


2) You will be required to buy a ticket BEFORE you arrive. As stated on the website, “tickets are issued for a specific date and time.” If you show up hoping to pay for a ticket, you will be out of luck! These tickets will be limited, so try to plan ahead.


3) Garden Pass Members do not need to purchase tickets beforehand.


4) 5pm-9pm will be open to Garden Pass Members only.


5) There will be peak hours pricing and non-peak hours pricing. For more information on the Christmas season pricing, see the Tickets page.


You can read more about the detail of the Christmas Season at the Longwood Gardens Christmas Page.

Christmas in July with Storkie.com

July 8, 2011


Have you ever wondered what to do with Christmas cards after the holidays have passed? I found a very cute and rewarding idea. Many children who are sick and in the hospital need to be cheered up, one way to do that is to have a hand made storybook. Children with infectious diseases need to be able to throw away anything that they touch and a storybook can be thrown away. With the picture storybook, it can be read and played with, they can enjoy the bright and cheerful pictures and then it can be destroyed. Make a child’s day and keep this thought in mind the next time you receive cards.

Another great idea is to cut out pictures from your photo cards and make a plate. This could be a gift for Mother’s Day or Father’s Day, the next Christmas or anything that suits your needs. All you need to do is cut out some pictures and greetings, get the plate you want, a clear one works best. Turn the plate upside down and using decoupage solution, glue the pictures and greetings on the plate in any order you want.

Many times I will look at a Christmas card and truly do not want to get rid of it, another idea to keep the memories from year to year is to make a Christmas place mat. This is a great idea for the kids to have. Cut out the pictures and greetings you want, arrange the pieces on an 11 x 17 piece of paper and glue them down. You can cut the paper before or after you have the pictures in place to give it a pretty edge or you can just leave it alone. When the place mat is finished, remember to have it laminated and with a permanent marker, right information on the back such as a year, names of people in the photos, ages the kids were when the place mat was made, etc. These too make great gifts.

If you are looking for great card, please visit Storkie.com

Truthfully Speaking…. With Toddlers!

December 23, 2010
Well sickness has swept through our house in many forms lately and while our moods were lacking, the wit from JT was up to snuff as usual!
As we drove around looking at Christmas lights last night JT held onto her coveted candy cane VERY tightly.  Said candy cane was found amidst one of our favorite Christmas light displays in Upper Moreland, thank you Valenzas for the fun tour of your bright yard! 
Anyhow, as we drove to see less impressive yet, still brightly lit houses, JT all of a sudden yelled out, “Daddy!!! Slow Dooooowwwwwnnn, please!  You’re going to break my candy cane!”  Daddy couldn’t stop laughing, nor could I…. and we laughed even harder when we realized that a little person’s tight grip truly did cause that candy cane to break, yet she still insists it was her father’s driving!  Said candy cane is now ‘recovering’ in our refrigerator as apparently this will make it better.
And for the record, Daddy was doing the speed limit…
Hope you all have a Merry Christmas and I am quite sure you will all have some awesome Toddler Truths to giggle about, I know I have my pen and paper ready J

Christmas Brunch

December 17, 2010

Every year I host a Christmas Breakfast/Brunch at my house for my family. The past few years there have been two items that are staples at my table and have become a tradition everyone looks forward to. Champagne with Pomegranate Juice – it’s festive, fun & yummy. Sort of a holiday twist on the Mimosa. And Baked French Toast. This is one of my favorites. It’s delicious, everyone loves it. But more than that, it is super easy and makes Christmas morning a breeze. I assemble it the night before, put it in the fridge and just pop it in the oven when everyone arrives. By the time we are finished with gifts, the French Toast is ready and we sit down to fabulous meal.
Recipe: Baked French Toast
adapted from Paula Deen
  • 1 loaf French or Challah bread
  • 8 Eggs
  • 2 cups Half & Half
  • 1 cup Whole Milk
  • 2 tbs Sugar
  • 1 tsp Vanilla Extract
  • 2 tbs Grand Marnier
  • 1/4 tsp Cinnamon
  • 1/4 tsp Nutmeg
  • pinch of Kosher Salt
  • Maple Syrup for serving

Slice the bread in 1″ thick slices. Lay the slices in a buttered 9 x 13″ shallow baking dish in 2 rows. Slightly overlap the bread.
Whisk together the eggs, half & half, milk, sugar, vanilla, Grand Marnier, cinnamon, nutmeg and salt in a large bowl. Pour the liquid mixture over the bread, evenly covering all the bread with the egg/milk mixture. Spoon some of the mixture in between the slices. Cover with foil and refrigerate overnight.
The next morning, preheat the oven to 350 degrees. If you are using the Praline Topping, spread it over the unbaked french toast and bake for 40 minutes. The french toast should be puffed and golden brown when you remove it from the oven. If you opt not to use the Praline topping, sprinkle with some confectioner’s sugar and serve with maple syrup.
Praline Topping (optional)

  • 1/2 pound (2 sticks) butter
  • 1 cup packed Light Brown Sugar
  • 1 cup chopped Pecans
  • 2 tbs Light Corn Syrup
  • 1/2 tsp Cinnamon
  • 1/2 tsp Nutmeg

In a bowl, combine all the ingredients and blend well. Spread evenly over French Toast prior to baking.

Recipe: Pomegranate Champagne
  • 2 oz Pomegranate Juice
  • 4 oz. Champagne

Pour Pomegranate juice into the bottom of a champagne flute and top with Champagne. If desired garnish with a couple pomegranate seeds or cranberries.

For more recipes, cooking and entertaining tips from Zareen, check out her blog Cooking With Z.

Keeping Christmas Magic Alive

December 3, 2010

When I was 10, I started to think that the whole Santa thing might be sort of untrue. It started to occur to me that perhaps, just perhaps, there wasn’t a big guy in a red suit sliding down the chimney each year.

But then on Christmas morning there was a boot print (a BOOT PRINT!) of ashes just outside of the fireplace!! And I ran around and told all of my (strangely skeptical) friends that it was TRUE and Santa was, in fact, REAL!!

I may have been a tad bit gullible. And my parents were very clever.

I think my little brother (who is 5 years younger) may have broken the news to me when I was about 15. I am still not sure he knew what he was talking about. I mean – there was a BOOT PRINT!!

This Christmas, my daughter is 10. And a tad bit gullible. And I have many many resources at my disposal to make sure she and her brother stay firmly convinced in the magic of it all. And, in the spirit of holiday giving, I am going to share those resources with you. You should use them too. We all could use a little more magic, even if it is technology-assisted!

Resource #1 The Santa Book –
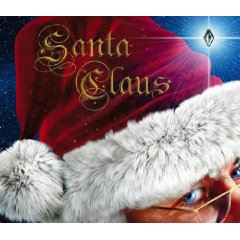
We purchased this book at Target a couple of years ago (there is a link to Amazon if you click on the picture) and my kids read it like it is the encyclopedia of Santa. It is really well written and gives the scoop on everything from why no one can see Santa’s workshop at the North Pole, to How he delivers everything in one night. Great for slightly older, but still believing kids.

If I wasn’t doing all of the shopping and wrapping I would totally believe that this was non-fiction!

Resource #2 The Santa Video – This one is new, but very cool in a sort-of-creepy way. You go to this website Portablenorthpole.tv and put in information about your kid (nothing scary), your zip code, and maybe a picture of your kid (I didn’t do that part and it was still cool). The site generates a FREE video of Santa talking directly to your child. Very fun.

Resource #3 The Santa Picture – I just found out about this one today, but I am immediately going to go do it. You take a picture of your living room, or the outside of your house. Then go to this site: Capture the Magic where you can paste a picture of Santa right into the picture of your house. Two pictures are $9.95 and then any more are $0.99 each. But that is photographic proof of Santa at your house!! And unless kids know about Photoshop…and many probably do at this point…this is the ultimate proof of realness!

Resource #4 The Official Santa Tracker – My Dad does this every year and the kids love to know where Santa is as we go about our Christmas Eve festivities. The Norad site tracks Santa’s progress around the world, encouraging the kids to get into bed before he hits the East Coast!

Put all of this together and you can create a pretty convincing case for the existence of a real Santa. Even more convincing than a boot print!

Now if I can just keep them from finding the pile of presents in the basement, I am golden for another year!

Kristen is a contributor at Chester County Moms. She lives in Chester Springs with her husband, daughter, Sprout (10); son, Tater (7); and two dogs. Be sure to read more about Kristen’s exploits as she attempts to keep her kids busy and entertained at http://www.thefunmommies.com/